If you are new to makeup or just tired of complicated routines, you are in the right place. These everyday makeup looks for beginners are designed to be fast, foolproof, and genuinely affordable. I have tested a dozen drugstore products to find formulas that actually work without breaking your budget. This whole routine takes five minutes, uses a few neutral tones, and leaves you with a natural glow that looks like you slept eight hours (even if you didn’t). No contouring, no cut creases, just a soft, real finish that makes your skin look better without looking like you tried too hard.
Why a five minute routine works for busy mornings and minimal makeup lovers
I used to think I needed at least fifteen minutes to look polished. Then I realized that most days all I really want is even skin, a little bit of eye definition, and a lip color that does not need a mirror. A five minute routine forces you to pick only the essentials. You skip the steps that do not matter for a casual day and focus on the ones that actually make a difference.
For beginners, a short routine is also less intimidating. You do not have to worry about blending eyeshadow for ten minutes or perfecting a winged liner. Instead you learn to use a few multitasking products that work with your natural features. And if you are on a budget, five minute routines are a lifesaver because you only need four or five products, not a full vanity drawer.
How to prep your skin with a budget friendly tinted moisturizer
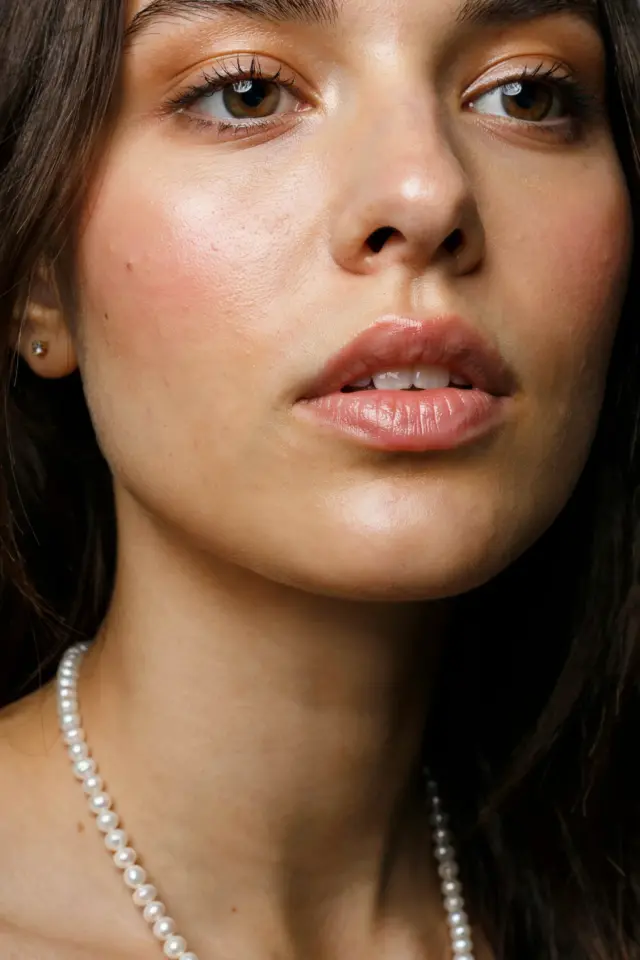
Skip the heavy foundation. A tinted moisturizer or BB cream gives you light coverage while hydrating your skin at the same time. Look for one with SPF to save an extra step. Drugstore brands like Maybelline, L’Oréal, or Neutrogena have solid options under fifteen dollars. I personally use the Neutrogena Hydro Boost Tint because it feels like nothing on my skin and does not settle in fine lines.
To apply, use your fingers instead of a brush. Warm the product between your hands and press it into your skin starting from the center of your face. This takes about thirty seconds and gives a more natural finish than a sponge. If you have oily areas, dust a tiny bit of translucent powder just on your nose and chin. That is all you need for a base that looks like real skin.
Neutral eyeshadow in one or two shades for a soft definition
Do not buy a huge palette when you are starting out. A single neutral eyeshadow stick or a small quad will do the job. Look for a matte beige or a soft taupe that is close to your skin tone. Sweep it all over your lid with your ring finger in a quick back and forth motion. That alone opens up your eyes without looking overdone.
If you want a tiny bit more depth, use a slightly darker shade (like a warm brown) in the crease. I use the e.l.f. No Budge Shadow Stick in Champagne because it blends easily and costs three dollars. You can also use a cream bronzer as a one and done eye color. Just tap a little on your lid and blend with your finger. It ties your whole face together and saves you from buying another product.
Adding a soft flush with a multipurpose cream blush or bronzer
Cream products are beginner friendly because they blend with your fingers and do not require special brushes. A cream blush or bronzer works on both cheeks and lips, so you get more use out of one product. I love the Wet n Wild MegaGlo Highlighting Blush in Peach Bums (it is actually a blush and highlighter in one). It costs around four dollars and gives a natural peachy flush that looks healthy.
Smile to find the apples of your cheeks, then tap a small dot of the cream blush there. Blend upward toward your temples using your ring finger. Keep the motion light and quick. If you accidentally apply too much, just pat a little of your tinted moisturizer over it to tone it down. This step takes maybe forty seconds and adds the glow that makes a natural makeup look read as fresh.
A quick brow fix that does not require a full pomade routine
Brows frame your face more than most people realize, but you do not need a whole kit. For a five minute routine, a tinted brow gel is your best friend. It adds color, holds hairs in place, and fills sparse spots in one swipe. The e.l.f. Wow Brow Gel is a drugstore favorite at only five dollars. I use the shade Brunette even though my hair is dark brown because it adds warmth without looking harsh.
Brush the gel upward and outward following the natural direction of your brow hairs. That lifts the arch and makes your eyes look more awake. If you have very unruly brows, you can first comb them with a clean spoolie, then apply the gel. This step takes maybe thirty seconds. Do not stress about symmetry. Real brows are sisters, not twins, and a relaxed look is part of the natural glow aesthetic.
Finishing with a soft lip color that lasts through coffee and lunch
Skip the lipstick that needs constant touch ups. Instead use a tinted lip balm, a lip stain, or a sheer gloss. A balm with a hint of color gives you moisture and a lived in look that fades evenly. I rotate between the Burt’s Bees Tinted Lip Balm in Rose and the CoverGirl Outlast Lip Stain in Nude. The stain lasts for hours even after eating and costs under eight dollars.
Apply it straight from the tube without a mirror. Smudge the edges with your finger for that blurred, soft look that is trendy but also forgiving. Do not worry about perfection. A slightly messy lip actually looks more natural and less done up. This is the last step in your five minute routine. Take a final look in the mirror, fluff your hair, and walk out the door feeling put together without feeling painted.
Affordable product list that keeps your routine under thirty dollars
Here is a quick rundown of the exact products I use and recommend for this everyday look.
#everydaymakeup #easymakeuproutine #naturalmakeuplook #makeupforbeginners #quickbeautytips