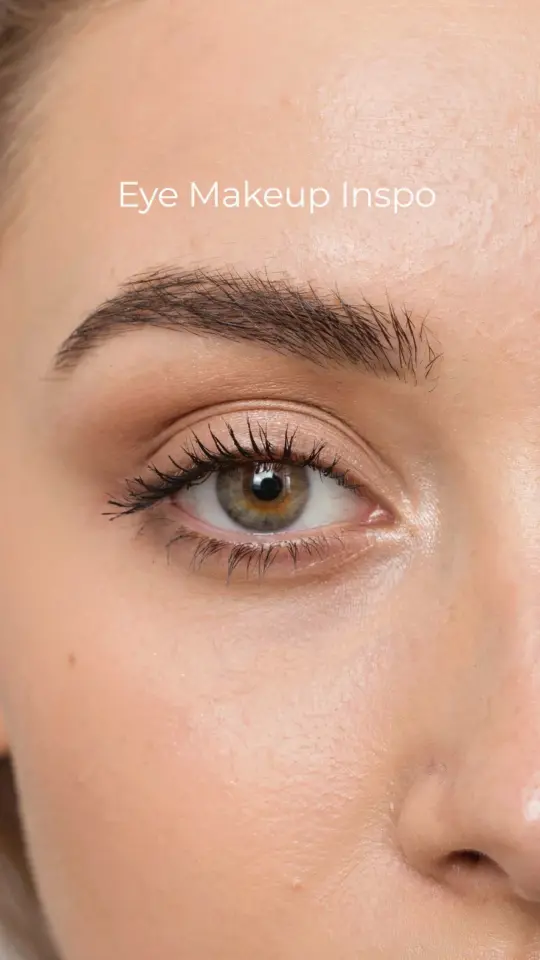
If you have ever watched a makeup tutorial and wondered why your eyeshadow never looks as seamless as theirs, the culprit is almost always a missing step. I am talking about the transition shade. That soft, in-between color that bridges your skin and the darker crease shades. Skipping it is the single most common eyeshadow mistake beginners make (and honestly, pros can be lazy about it too). The result? Harsh lines, patchy blending, and that dreaded muddy look. The fix is simple: grab a fluffy brush and a matte shade slightly darker than your skin tone, then blend it into the crease before you add any darker colors. I promise, it makes a huge difference. Try it next time.
What Exactly Is a Transition Shade (and Why Does It Matter)?
A transition shade is basically the middleman of your eyeshadow look. It is a matte color that sits right between your skin tone and the darkest shade you plan to use in the crease. It does not have to be anything fancy. Just a shade that is a few steps deeper than your natural complexion. Think of it as a buffer.
Without it, your dark crease shade hits your bare lid with no soft gradient. That creates a hard line no amount of windshield-wiper blending can fix. I have seen people spend ten minutes going back and forth with a brush, only to end up with a grey smear. Not cute. The transition shade literally does the blending work for you.
Here is a weird little thing I noticed: when I use a transition shade, my eyeshadow lasts longer too. Maybe because the powder layer gives the darker pigments something to grip? Or maybe I am just imagining it. Either way, it helps.
The Single Biggest Sign You Are Skipping This Step
Look at your finished eyeshadow in natural light. If you see a distinct border where the color ends and your bare skin begins, you probably skipped the transition shade. Another telltale sign: the crease looks patchy, like someone scribbled with a blunt crayon. Or worse, the whole eye area looks dirty instead of defined.
Beginners often think they are blending enough. They swirl the brush in circles for ages. But without that intermediate tone, the dark shade just moves around rather than diffusing. It is like trying to paint a gradient with only black and white. Sure, you can do it, but it takes way more skill and patience. A transition shade is the shortcut you actually want.
And honestly? If you ever post a makeup selfie and someone asks “did you blend that part?” you know what went wrong. We have all been there. It is fixable.
Why a Fluffy Brush Changes Everything
You cannot apply a transition shade with a packing brush. That is a rookie mistake I see in every beginner kit. The shape and density matter. You need a fluffy, slightly domed brush. Think of it like a makeup puff for your eyelids, but smaller. The bristles should be loose enough to deposit color lightly and then sweep it across a large area.
My go-to is a typical crease brush from a drugstore brand. It cost me eight dollars and has lasted three years. Seriously, do not overthink the tool. The key is the fluff factor. A dense brush will deposit too much product in one spot, defeating the purpose. A fluffy brush gives you that airy, barely there application.
- A fluffy brush diffuses pigment evenly. No harsh edges.
- Use a tapping motion to pick up product. Never swirl deep into the pan. It kicks up too much powder and makes the brush stiff.
- After tapping, tap off the excess on the back of your hand. This one step prevents the dreaded mud.
One more thing: clean your brush between colors. I know, nobody does it every single time. But if your transition shade is a warm tan and your crease shade is a deep brown, leftover red tones will mess with your blend. A quick wipe on a towel works in a pinch.
How to Pick the Right Transition Shade for Your Skin Tone
This is where most beginners freeze. They see a palette with twenty shades and pick the one that looks like the tutorial person used. But that person has a totally different skin tone. So the shade that looks beige on them might look grey on you. And grey is not your friend.
The rule is simple: your transition shade should be one to two shades darker than your natural skin tone on the lid area. If you are fair, look for a soft peach or a light warm taupe. If you are medium, a dusty rose or a light caramel works well. For deeper skin tones, try a muted warm brown or a rich terracotta. You want something that disappears into the skin but still gives a hint of depth.
I am going to be honest: some brands make transition shades that are too cool-toned for everyday wear. Cool-toned taupe can make you look tired if your skin has warmth. So swatch before you buy or test on your arm. Hold your arm next to your face. If the shade looks ashy, skip it. No amount of blending will fix a undertone mismatch.
Also, a quick aside: I have a mild obsession with the shade “Soft Brown” from MAC. It works on almost every skin tone I have tried it on. Not sponsored or anything, I just keep repurchasing it. If you want a safe one-size-fits-most option, that is mine.
Step by Step: The Correct Way to Apply a Transition Shade
Ok so here is the actual technique. You start with a clean, primed eye. A little bit of foundation or concealer on the lid is fine, but set it with a powder first. Sticky primer + transition shade = instant mud ball. So dust a translucent powder over the primer.
Now take your fluffy brush. Dip it lightly into the transition shade. Tap off the excess on the back of your hand. Then go into the crease area. Do not press hard. Use light, back-and-forth windshield wiper motions. Keep the brush angled slightly, so the bristles hit the crease bone. Sweep across the entire socket line, from the inner corner to the outer edge.
Here is the trick most tutorials skip: once you have laid down the initial sweep, keep blending with the same brush (no more product) using small circular motions along the edge. This softens any lines. The transition shade should look like a faint shadow, not a distinct stripe. If it looks too strong, wipe the brush on a tissue and blend again.
Do this on both eyes before moving to your darker crease shade. Why both eyes? Because if you spend ten minutes perfecting one eye and then rush the other, the symmetry goes out the window. Trust me on this.
Common Blending Mistakes Even After Using a Transition Shade
Even with a perfect transition shade, things can go sideways. One mistake is using too much product. A little goes a long way. If you overload the brush, the shade becomes opaque and you lose that soft wash effect. Then you have to blend like crazy, which drags the color down onto the lid. Not ideal.
Another error: using the same brush for your transition shade and your dark crease shade without cleaning it first. The colors mix on the bristles and create a brownish blob. Suddenly your pretty warm orange crease looks like a bruise. A quick spritz of brush cleaner or a wipe on a dry towel prevents this.
And here is a weird one: people forget to blend upward. They stay in the crease line. But the transition shade should extend slightly above the crease, into the brow bone area, but not touch the brow itself. That upward blend creates the lifted, open-eyed effect. Without it, even a perfect transition looks flat.
One last thing: if your shadow looks muddy, check the formula. Some matte shadows are just chalky and hard to blend. Not your fault. A good transition shade should feel silky, not powdery. If your palette is low-quality, invest in a single shadow from a reputable brand. One good shade beats a whole muddy palette.
Quick Fix: What to Do If You Already Skipped the Transition Shade
Look, we all have rushed mornings. You put on dark shadow, no transition, and now it looks like a mess. Do not panic. Do not try to add the transition shade on top. That will create a weird layered texture.
Instead, take a clean fluffy brush and a translucent setting powder. Dip the brush into the powder, tap off, and gently blend over the edges of your dark shadow. The powder will soften the harsh line and lighten the pigmentation slightly. It is a band-aid, not a perfect fix, but it saves the look.
Another hack: use a skin-toned concealer on a small flat brush to clean up the edges. Then blend the concealer outward with a clean sponge. This works especially well if you have a defined cutoff at the outer corner. I have done this more times than I care to admit. No one has ever noticed.
But honestly, learning to add that transition shade from the start is the better long-term move. It takes ten extra seconds and saves you ten minutes of fixing. Worth it, right?
Start your next eye look with a transition shade and a fluffy brush. Watch how the rest of your shadows glide into place. It is the one step that separates a so-so makeup day from a really good one. Try it and see.
#eyemakeupmistake #transitioneyeshadows #makeuptips #beginnerfriendly #eyeinspo
Leave a Comment