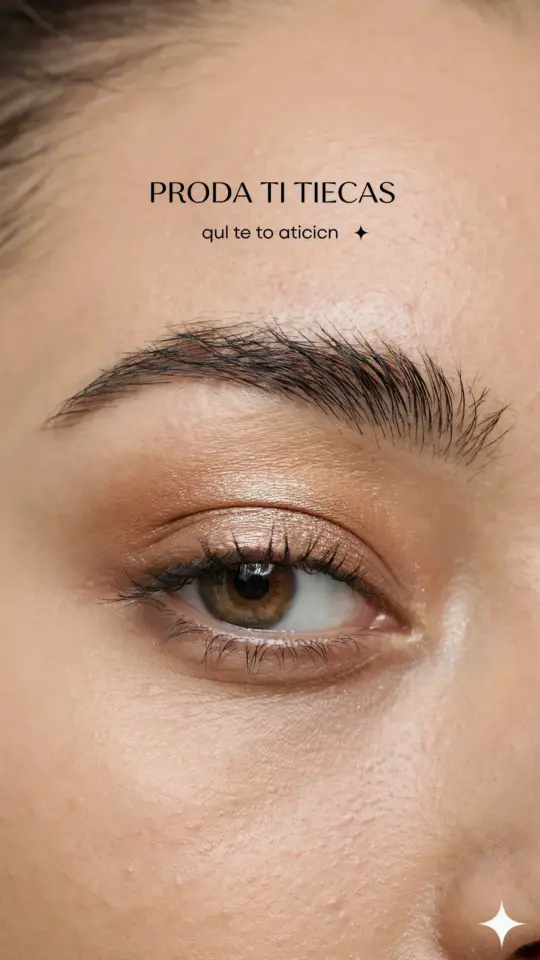
You are ten minutes late, your concealer is somewhere in the bottom of your bag, and the coffee is burning your tongue. You glance in the mirror and decide that maybe, just maybe, you can skip the eyeshadow today. Don’t. This eye makeup tutorial is the reason you don’t have to choose between sleep and looking put together. We are doing a five minute, one-product base look that costs less than your lunch.
The trick is a cream eyeshadow stick. It cuts out the brushes, the fallout, and the decision fatigue. It is literally just color, smudged, done. If you have been living under a rock and haven’t tried one yet, get ready for your mornings to get a whole lot easier.
Why a Cream Eyeshadow Stick Beats Powder for Everyday Wear
Powder eyeshadow demands a primer, a fluffy brush, and a steady hand. Cream shadow sticks are the lazy girl’s cheat code, and I mean that as the highest compliment. Look, the formula is almost foolproof because it melts into your skin and blends itself with just a fingertip. You don’t need a multi-step routine to make it look seamless.
Besides the speed, the wear factor is different. These sticks are packed with emollients and waxes that grip the lid. This means less creasing on oily eyelids, especially if you set it with a light dusting of translucent powder. Honestly, I find that most drugstore sticks last longer than high-end powder shadows, probably because they almost act like a paint.
And the portability factor cannot be beaten. Forgot your brush bag at home? No problem. The stick goes directly on the eyelid, no tools required. I keep one in my glovebox, which says a lot about my life, but also how much I trust this product format.
How to Apply Makeup Fast: The 3-Step Base Routine
Ok so here is the entire “tutorial” part. It is almost laughably simple, but the technique is where people mess it up. You do not need a primer, you do not need a brush, and you definitely do not need a cut crease. Not on a Tuesday morning.
1. **Draw the base:** Swipe the stick directly across your upper lid, from inner corner to outer corner. Don’t worry about getting it perfect. Just get a solid stripe of color where your eyeball sits. Use your ring finger to pat it gently to blend the edges. Tapping, not rubbing, is the secret.
2. **Define the outer V:** Apply a small dot to the outer corner of your eye, right where the lash line ends. Smudge this outwards and upwards with your fingertip. This gives you a lifted, shadowed effect that makes it look like you did way more work than you actually did.
3. **Save the waterline:** If you want extra depth, draw the stick along your lower lash line and smudge with a Q-tip. It is a smoky eye in thirty seconds, and it anchors the whole look.
Remember, the goal isn’t perfection. The goal is to look human and awake. Let the cream do the heavy lifting.
Choosing the Right Cream Eyeshadow for Beginners (and Cheapskates)
You cannot just grab any glitter bomb in a tube, because some formulas are awful. They drag, they dry down patchy, and they highlight every crease you have. The best beginner-friendly formula is a satin or a matte finish, not a glittery one, because shimmer catches on dry patches.
Here is the thing about shade matching: ditch the trends. You want a color that mimics your skin tone, just slightly deeper. For fair skin, a soft taupe or mushroom brown works. For medium skin, look for a bronze or a caramel. For deeper skin tones, a rich terracotta or a mahogany shade is your daily driver. The goal is to create a shadow that looks naturally like your eyelid, just better.
Avoid anything too warm or too orange, as it can look bruise-like after an hour. And be careful with “frosted” finishes. A slight sheen is great, but disco-ball sparkle on the lids at 8 AM is a choice. Honestly, if you find a good shade, you can also swipe it on your cheekbones for a flush of color, making it a two-in-one product.
My Honest Picks for Cheap Cream Eyeshadow Sticks
I am not going to recommend a $30 Sephora stick when you can get the same result for $8. Look, the pharmacy stuff is criminally underrated these days. My absolute favorite for everyday has to be the **ELF No Budge Shadow Stick**. It has a weird name, but it works, and it survives a sweaty commute without migrating into your eyebrows.
Another solid option is the **Wet n Wild Color Icon Kohl Liner**. Yes, it is technically a liner, but the creamy formula makes it a perfect eyeshadow base if you blend it fast enough. It is cheap enough to buy three shades and experiment. However, if you want a slightly more luxurious texture without the luxury price, the **Revlon ColorStay Creme Eyeshadow** is a bit silkier and comes in more subtle neutral shades, if you can still find it in stores. It seems like it always goes out of stock at my local CVS, which is annoying.
One warning: some cheap sticks are too dry. If the product pulls at your skin instead of gliding on, you are fighting an uphill battle. Look for words like “creamy” or “gel” on the packaging, and check the texture in the store if you can. This is the one thing worth being picky about.
The Smoking Gun: Why Brown Liner Beats Black for Neutral Makeup
A black liner is often too harsh for this style of minimal neutral makeup, and it can trick the eye into thinking you are wearing a full face of war paint. A deep brown liner grounds the look and adds definition without shouting for attention. It blends into the crease you just created.
Take a brown pencil, line the upper lash line, and then look down and press your finger over it to smudge it. You don’t want a sharp line. You want a faded, blurred edge that just thickens the lash line naturally. This creates that “my lashes but better” effect, and it makes the cream shadow stick look intentional. Add a coat of mascara, and you are done.
For an even lighter touch, skip the top liner altogether. Just use the cream stick on the lid, and use a brown pencil to tightline the upper inner rim of your eye. It sounds scary, but it just adds a shadow of definition that is completely invisible as a “line”, just visible as lash density.
Common Mistakes to Avoid When You Are In a Rush
The biggest enemy of a fast makeup routine is muddy blending, and we have all been there. You’ve smudged and swiped and now you look like you have a black eye. The trick is to use a light hand and stop while you are ahead. You don’t need to blend the cream to high heaven.
Another habit that ruins the look is applying the stick right after moisturizer. If your eye area is still tacky or slick, the cream will shift around. Wait sixty seconds for your skincare to dry down or, better yet, just skip moisturizer around the eye entirely in the morning. I know, my dermatologist is rolling her eyes too, but for a 5 minute makeup look, it works.
Lastly, setting the look is non-negotiable. You don’t need powder over the whole lid, just a tiny touch on the outer corner and the lash line. This stops the cream from pooling in the little lines at the corner of your eyes, which happens to everyone over the age of 25. Use a minimal brush, tap, and run.
How to Make One Eyeshadow Stick Work All Week
This might seem crazy, but a single stick can be your entire eyeshadow wardrobe if you manipulate the application. Use it lightly for a wash of color on a Monday, and pack it on heavily for a smoky evening look on Friday. Layer it under a powder shadow to make the powder pop and last. The versatility actually beats owning a 12-pan palette, because it takes up no space.
You can also use it as a base for a loose pigment if you are feeling fancy. A lot of people think cream shadows are only for a natural look, but that is not true. They are just transport systems for color, and they are the fastest ones to work with. The most important thing is that you find a routine that makes you feel like yourself, without spending an hour obsessing over blending or paying $40 for a tiny pan of pressed dust.
The sooner you realize that a polished look does not require an entire collection, the easier your mornings will get.
So, what is the one quick makeup product you swear by? I am always looking for a new fast fix, and I love a good drugstore discovery. Drop your go-to in the comments below.
Leave a Comment