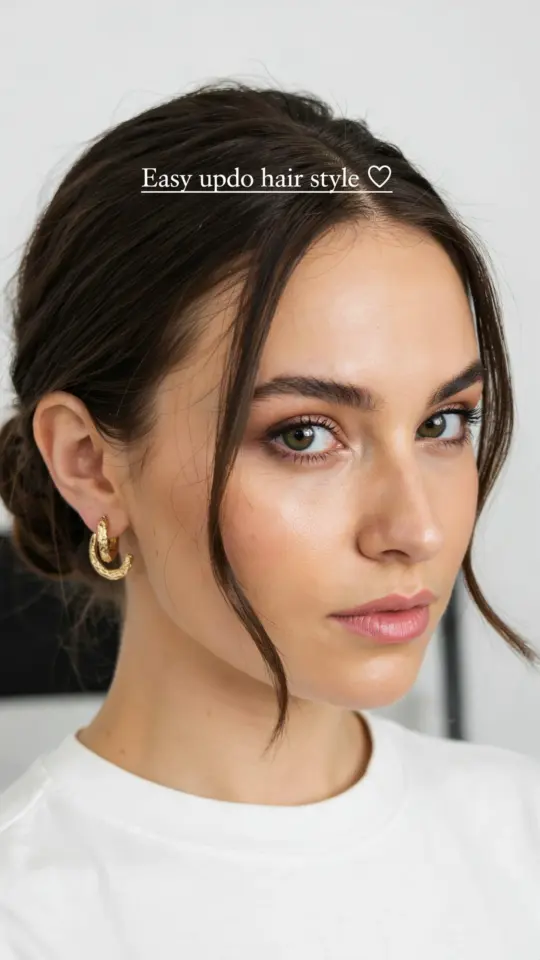
If you have ever felt overwhelmed by complicated makeup routines or expensive product lists, this easy makeup tutorial for beginners is exactly what you need. I am talking about a soft, natural everyday look that uses just five essential products, none of which will break your budget. Whether you are new to makeup or just want a quick, polished routine that works for school, work, or running errands, this step-by-step guide will walk you through simple blending techniques and smart placement. I have tested these tips on myself and friends, and they truly make a difference for a flawless finish that lasts all day. Let us get started without any fluff or fuss.
Why Less is More for a Natural Everyday Makeup Look
When I first started wearing makeup, I thought I needed a dozen products to look put together. Turns out, I was wrong. A natural everyday look is about enhancing your features, not covering them up. Using fewer products saves you time, money, and frustration. Plus, it is much easier to learn blending techniques when you are not juggling ten different brushes.
For beginners, starting with a minimalist routine builds confidence. You can always add more later if you want. But honestly, a soft wash of color on the eyes, a bit of coverage, and a natural lip are all most of us need for a fresh face. And the best part? You can pull it off with drugstore finds that cost under five dollars each.
The 5 Essential Products You Actually Need (On a Budget)
Here are the only products you should buy for this beginner friendly natural makeup routine. I have chosen affordable options that work great without the high price tag.
- Tinted moisturizer or light coverage BB cream (for example, Maybelline Dream Fresh BB Cream or a drugstore brand like e.l.f. Cosmetics foundation balm).
- A concealer one or two shades lighter than your skin tone (to brighten under the eyes and cover any spots). The Nyx Can't Stop Won't Stop Concealer is a solid cheap pick.
- A neutral eyeshadow palette with two or three matte shades (nothing fancy, just a light brown and a slightly deeper brown). You can find small palettes from Wet n Wild or ColourPop for less than ten dollars.
- A cream blush or lip and cheek tint (multitasking saves money and time. I like the e.l.f. Monoi Multi Stick or a simple Burt's Bees lip tint used on cheeks).
- A tinted lip balm or a sheer lipstick (for a hydrated, natural lip color. Chapstick tinted balms or Nyx Butter Gloss work beautifully).
That is it. No powder, no highlighter, no brow gel (unless you want them). Five products, all easy to find at any drugstore or online for under thirty dollars total.
Step 1: Prepping Your Skin Without Spending a Fortune
Before you apply anything, clean skin is key. But you do not need a fancy primer or a seven-step skincare routine. Just wash your face with a gentle cleanser, and if your skin is dry, apply a simple moisturizer like CeraVe or Cetaphil. Wait a minute or two for it to sink in.
If you have oily skin, skip the heavy moisturizer and use a lightweight gel. A good tip is to pat your face with a damp paper towel to remove excess moisturizer before makeup. This helps the tinted moisturizer glide on smoothly without pilling. And if you want extra staying power, a cheap mattifying primer from e.l.f. works well, but it is optional. For this natural everyday look, I often skip primer entirely and my makeup lasts fine.
Step 2: Easy Foundation and Concealer Placement for Beginners
Now take your tinted moisturizer or BB cream. Squeeze a pea sized amount onto the back of your hand, then dot it onto your forehead, cheeks, nose, and chin. Use your fingers to blend it outwards. Fingers work best for a light finish and are free. Start from the center of your face and blend toward your hairline and jaw. Do not forget to blend down your neck slightly so there is no harsh line.
Next, grab your concealer. Dab a small amount under your eyes in an upside down triangle shape. Also dot it on any redness or spots. Use your ring finger to gently tap the concealer into the skin. Do not rub, tapping blends it without wiping away the product. If you have dark circles, let the concealer sit for thirty seconds before blending. This gives it time to warm up and cover better. You now have a smooth, even base that still looks like your skin.
Step 3: Simple Eye Makeup That Opens Up Your Eyes
For a natural everyday look, skip heavy eyeliner and false lashes. Instead, use your neutral eyeshadow palette. Take a fluffy brush (or even a clean fingertip) and dip into the light brown shade. Tap off the excess, then sweep it across your eyelid from the lash line up to the crease. Keep it soft, no harsh lines.
Then take a smaller brush with the deeper brown shade. Gently press it into the outer corner of your eye and blend inward along the crease. A little goes a long way. This adds subtle depth without looking like you tried too hard. If you want a little shimmer, pat a champagne shimmer shade (if your palette has one) onto the center of your lid. Otherwise, skip it for a more matte, natural finish.
Finish with a single coat of mascara if you have it, but it is optional. The eyeshadow alone already makes your eyes look more awake. I find that curling your lashes without mascara also looks very fresh and clean.
Step 4: A Touch of Color on Cheeks and Lips
Take your cream blush or lip and cheek tint. Smile to find the apples of your cheeks, then dab a tiny amount onto each cheek. Blend with your fingers in a tapping motion upward toward your temples. Cream blush blends easily and looks dewy, not powdery. Start with very little, you can always add more.
For the lips, apply your tinted lip balm or sheer lipstick. Blot with a tissue if you want a more matte look. You can also use a bit of the same blush on your lips for a monochromatic vibe. That saves even more money and creates a cohesive natural makeup look. The key is to keep everything subtle so it looks like you woke up like this, not like you spent an hour in front of the mirror.
Step 5: Setting Your Look to Last All Day (Without Powder if You Want)
You do not actually need a setting powder or spray for a natural everyday look, especially if your skin is dry or normal. If you tend to get oily, you can use a translucent powder only on your T zone (forehead, nose, chin). Press it in with a fluffy brush, do not swipe. A cheap drugstore powder like Coty Airspun works great.
If you skip powder, the tinted moisturizer and cream products will settle into your skin nicely after about ten minutes. They will look more natural as the day goes on. For extra longevity, you can spritz a little rose water or a drugstore setting spray (like Nyx Matte Finish) from a distance. But honestly, for a beginner, just letting it set naturally is fine. You will get compliments on your glowing skin, not on your expensive products.
Conclusion: Keep It Simple, Keep It Real
This step-by-step guide proves that you do not need a makeup artist or a huge budget to create a natural everyday look. With five affordable products and a few easy blending techniques, you can feel polished and confident in under ten minutes. The best part is that this routine is flexible. Swap out colors, skip steps, or add more when you feel ready. That is the real beauty of beginner friendly makeup: it grows with you.
I hope this tutorial helps you save time and money while looking like the best version of yourself. Try it out tomorrow morning and see how easy it is. And if you found this useful, share it with a friend who is just starting their own makeup journey. Save this guide for your next morning routine, I promise it makes getting ready a whole lot less stressful.
#makeuptutorial #beginnerfriendly #naturalmakeup #everydaymakeup #stepbystep
Leave a Comment