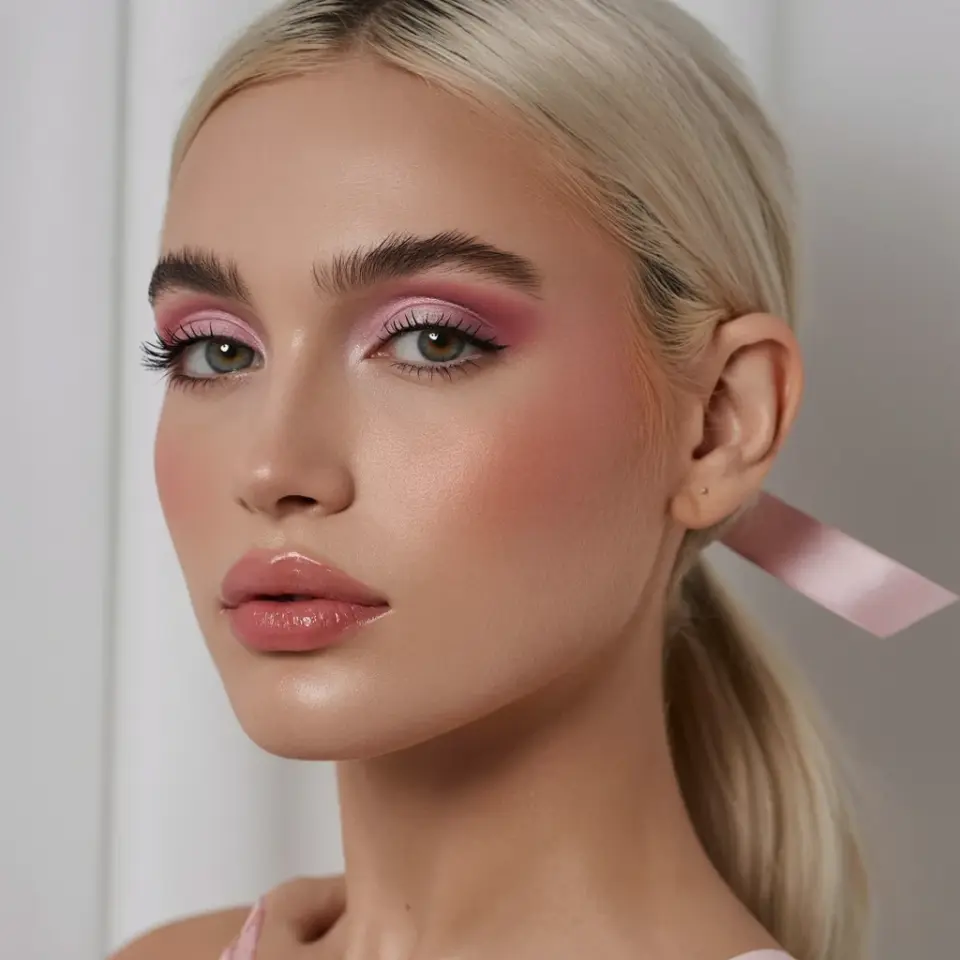
Why This Pink Glitter Eyeshadow Look Works for Parties
If you have been scrolling through Pinterest for party makeup ideas, you have probably noticed how often pink glitter eyeshadow paired with a precise winged eyeliner takes the spotlight. That combo creates just the right balance between soft femininity and bold definition. I have worn this exact look to birthday dinners, club nights, and even casual brunches where I wanted a little extra shimmer. The secret lies in layering textures: a smooth rose gold base catches light evenly, fine pink glitter adds dimension without looking chunky, and a black liquid liner anchors everything so the eyes remain the focal point. When you finish with false lashes and a nude lip, the whole face feels polished but not overdone.
Prepping Your Lids for Long Wearing Pink Glitter
Before you touch any shadow, you need a clean, dry lid. I always start with a thin layer of eye primer spread from lash line to brow bone. This stops the glitter from migrating into creases or dropping onto your cheeks. If you do not have a dedicated primer, a dab of concealer set with loose powder works almost as well. Wait one minute for the primer to become slightly tacky. That tackiness grabs the glitter and keeps it in place through an entire night of dancing or photo posing. Skipping this step often leads to glitter fallout mid party, which I guarantee you do not want to fix in a bathroom under harsh lighting.
Rose Gold Base: The Foundation for Pink Glitter Eyeshadow
Your first shadow layer should be a rose gold shimmer, not the pink glitter itself. Pick a shade that leans slightly warm with a metallic finish. Using a flat shader brush, pat the rose gold all over your mobile lid, stopping just below the crease. Do not swipe; patting presses the pigment into the primer for maximum color payoff. I prefer a cream formula or a very finely milled powder for this step. Rose gold complements most skin tones and creates a luminous undertone that makes the later pink glitter appear brighter. If you apply pink glitter directly onto bare skin, it can look flat or wash you out. The rose gold solves that problem instantly.
How to Pack on Fine Pink Glitter Without Fallout
Now comes the part that intimidates most people: applying loose or pressed pink glitter. The trick is to use a damp brush. Lightly mist a flat synthetic brush with setting spray or water, then dip it into the glitter. Tap off the excess on the back of your hand. Press the glitter onto the center of your lid, blending outward toward the inner and outer corners. Avoid dragging the brush, because that will disturb the rose gold underneath. I like to build two thin layers rather than one thick glob. The first layer gives a sheer sparkle; the second adds visible dimension. If you want extra intensity, you can also use a glitter glue applied only to the center of the lid before pressing on the glitter. But a damp brush alone usually does the job.
Bulletproof Tips for Keeping Glitter Where You Want It
- Hold a tissue or a piece of tape under your eye while applying glitter to catch fallout instantly.
- Tap the brush handle gently against your sink before bringing it near your face to dislodge loose particles.
- If glitter lands on your cheek, do not rub it. Press a piece of sticky tape against the stray specks to lift them cleanly.
- Use a fluffy brush with a tiny amount of translucent powder around the edges of the sparkle to define the shape.
Creating a Sharp Winged Eyeliner That Complements Glitter
Winged eyeliner next to high shimmer can be tricky because the glitter texture makes the liner drag. I always apply my black liquid liner after the shadows are fully set and dry. Choose a pen style liner with a fine felt tip for the most control. Start by drawing a thin line from the inner corner of your eye outward, keeping it as close to the lash line as possible. Then map your wing by tilting your brush toward the end of your eyebrow. Connect the wing back to the middle of your lid in a smooth triangle, then fill it in. Because your lid already has rose gold and glitter, you want the liner to stay matte or very minimally glossy. A glossy liner over glitter can look messy. I also recommend letting the liner dry for thirty seconds before opening your eyes fully, to avoid smudging the wing onto the crease.
Fixing a Wonky Wing Without Starting Over
No one gets perfect wings on the first try every time. If your wing is too thick or crooked, dip a flat angled brush into micellar water or makeup remover and carefully trace along the edge to tidy it up. You can also use concealer on a tiny brush to carve out a clean line underneath the wing. This trick works especially well if the glitter shadow has migrated slightly onto your brow bone. Just dab a bit of concealer onto the area and blend with your fingertip. The contrast between the crisp liner and the soft pink glitter will become even more striking.
False Lashes That Make Pink Glitter Eyeshadow Pop
Choosing the right false lashes matters more than you might think. Heavy, dramatic lashes can overpower the delicate pink glitter. I prefer wispy hybrid lashes with a mix of thin and slightly thicker bands. They add volume and length without hiding the sparkle you worked so hard to apply. Apply a thin strip of lash glue along the band and wait twenty seconds until it becomes tacky. Use tweezers to place the lash as close to your natural lash line as possible. After the glue dries, gently press your real lashes and the falsies together using a lash curler. This blend creates a seamless look. If you want extra hold, squeeze a tiny line of black liquid liner along the top of the lash band to camouflage any glue residue.
Finishing the Look: Nude Lip and Subtle Skin
When your eyes carry that much pink glitter and a sharp wing, your lips and complexion should stay understated. A nude lip is your best friend here. Choose a shade that is one or two tones darker than your natural lip color, with a satin or
#pinkglittereyeshadow #wingedeyeliner #glammakeup #eyemakeupinspo #partylook
Leave a Comment